git
🏠 Homepage
⬅️ Previous: 👤 Setting up GitHub Account
5. 🔧 Creating Your First GitHub Repository
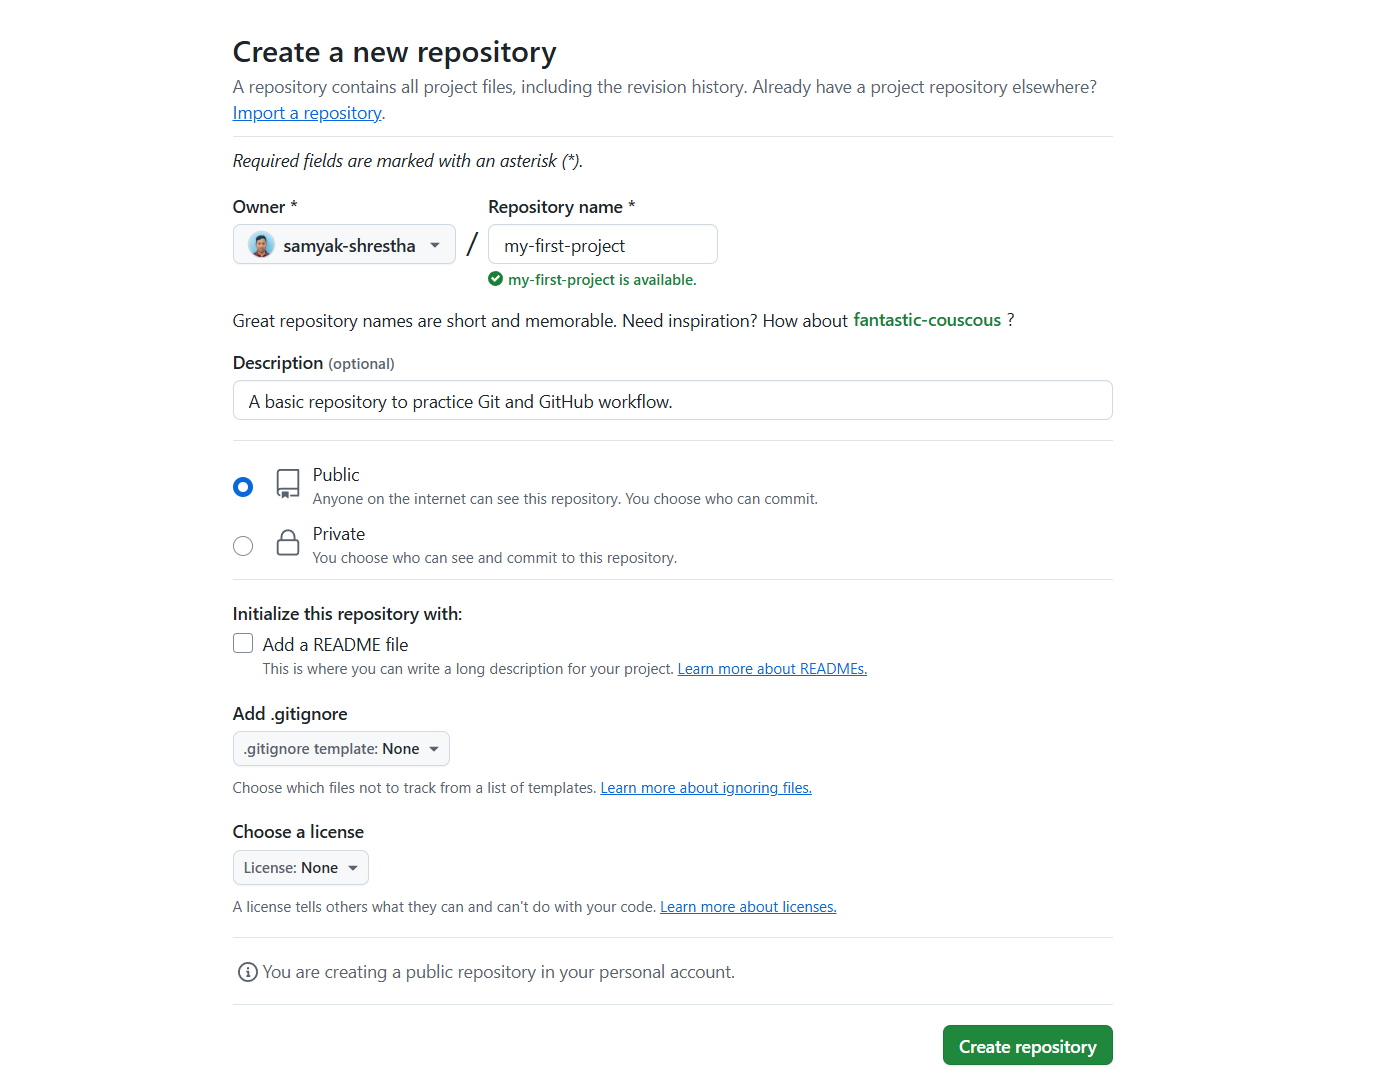
🔧 Example of Creating Your First GitHub Repository
Follow these steps to create your first repository on GitHub. This guide explains each field with examples and tips.
1. 📝 Repository Name
- It’s a place where you can store your code, your files, and each file’s revision history
Example:
my-first-repo
✅ Tips:
- Use lowercase letters and hyphens instead of spaces
- Keep it short and meaningful
- Avoid special characters or long names
2. 🖊️ Description (Optional but Recommended)
Example:
A basic repository to practice Git and GitHub workflow.
✅ Helps others understand what your project is about
✅ Appears on your profile and search results
3. 🔒 Repository Visibility
| Option | Description | When to Choose |
|---|---|---|
| Public | Anyone can view your repository | For open-source or practice |
| Private | Only you (and collaborators) can view | For school/private projects |
For learning: ✅ Public is usually the best choice.
4. 📄 Initialize This Repository With:
✅ README File
- Adds a starting
README.mdfile to your repository. - ✅ README file – acts as a project introduction; recommended
- ⚠️ When not to add – if you’re importing an existing repo via Git
Example README Content:
# My First Repository
This is a practice repo for learning Git and GitHub.
✅ Check it if you’re starting fresh ⚠️ Uncheck if you will push an existing project from your computer
5. 🛑 .gitignore
- A
.gitignorefile tells Git which files or folders to ignore so they are not tracked or committed to your repository. - This helps you avoid pushing unnecessary or sensitive files (like passwords or large cache folders).
- What it does: tells Git which files to ignore (e.g., node_modules, env files)
Example:
If you’re creating a Python project, choose the Python template from the dropdown.
It will ignore files like:
pycache/
*.py[cod]
.env
Other available templates:
- Node (for JavaScript/Node.js projects)
- Java
- Unity
- C++
- Many more…
✅ Choosing the right .gitignore keeps your repo clean and professional.
6. 📜 License
Adding a license lets others know what they can or can’t do with your code or content.
| License | Description | Best For |
|---|---|---|
| MIT | Very permissive. Allows reuse with attribution. | ✅ Beginners, tutorials, open-source |
| GPL | Requires derivative works to also be open source. | Strict sharing & free software fans |
| Apache 2.0 | Like MIT but includes patent protection. | Enterprises and large projects |
| Creative Commons (CC-BY 4.0) | For non-code content like documentation, tutorials, blog posts | ✅ Writers, educators, designers |
| None | No license = all rights reserved. | Private or restricted projects |
⚠️ Note:
Use Creative Commons licenses only for content, not code.
For code, prefer MIT, GPL, or Apache.
For writing, art, or course material, CC-BY 4.0 is a great choice — it allows reuse with credit.
Example selection for students:
- Code project? ✅ Choose MIT
- Writing a tutorial or guide? ✅ Choose Creative Commons (CC-BY 4.0)
7. ✅ Final Step: Click “Create repository”
After completing the form and selecting the appropriate settings, click the green “Create repository” button.
You’ll be redirected to:
- Your new repository page
- A list of files (README,
.gitignore, LICENSE if added) - Options to upload, clone, or start committing code
➡️Up Next: 🔄 Basic Git Workflow